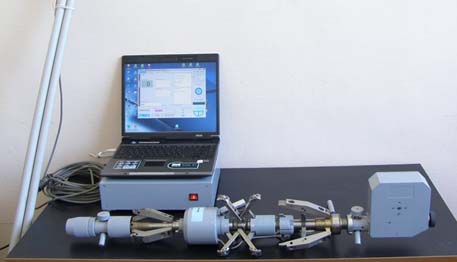
It is intended for measurement of deviations of axis of an internal cylindrical surface of a pipe (straightness). It is used at acceptance tests and for measurements when carrying out of technological operations (straightening of pipes). The device provides measurements in the horizontal and vertical planes simultaneously when location of a controlled part (pipe) on two (and more) supports and when single-sided (one-sided) fixing of a part. The error of measurements does not depend on the length of the part.
Based on measurement results an angular deviation of the actual axis of a pipe in the axial plane –a so-called muzzle angle of a pipe can be defined.
Figure 1.1 – Overall view of the device “Vizit-1M”
Basic technical characteristics
| internal diameter of a controlled part (pipe), mm | from 105 to 155 |
| length of controlled parts, mm | to 7000 |
| nonstraightness of axis, mm | ±2 |
| error of measurement, mm, no more | |
| in the horizontal plane | 0,03 |
| in the vertical plane | 0,05 |
| least significant digit of the value of nonstraightness, mm | 0,001 |
| measurement pitch over the length of a part, mm | 10 |
| measurement rate, mm/s | up to 100 |
Note – The possibility of production of the device “Visit-1M” device for measurements of up to 9000 mm run of pipes is in the works.


